So i started a while ago to expand my hoby's with electronics and microcontrollers. Most of free "nights" i stayed long trying to see what is posible to achieve with very popular mini computer known as "Raspberry Pi". My ideas were growing as i entered to this unknow world of electronics, linux and programing.
So here it is my first project that was in my mind for a long time. It's called "Raspberry Pi WeratherStation".
Basically it's a Pi with some sensors, Raspbian OS, Python scripts and some HTML and Javascript platform.
In creating this project i did help my self with web as there is a lot of sites that users contribute to Pi project's. In the spirit of keeping this open source project alive, this is my contribute:

What you need:


.jpg)
Wiring Pi board and sensors:
Here is the biger image of WeatherStation sensor scheme board
At the moment as i am writing this tutorial the project is not 100% finished but as for the basic work has been done the WeatherStation project is in Slovenian language. Later on i'll try to translate it to Enaglish mybe someone can help and do some other language's too. Feel free to contact me.
What you need:
- Raspberry Pi board (512MB version in my case)
- Sensors:


- DHT11 Humidity sensor:
- Digital light sensor GY30/BH1750FVI
- Other stuff
- 5V adapter for Raspberry Pi. Just make sure u got the right connector for power the Pi and the adapter has at least 1A, Something like this

- Some ribbon cable. I figure out the one from LPT ports we use to use in a PC are just the right to use. They look like this:

- Two (2) x 4.7KΩ resistors for DS1820S temperature sensor and DH11 Humidty sensor.

- Some wires (i use them from network cable) and mybe some female header pins for eazy disconnecting sensors.


Wiring Pi board and sensors:
So if we have all parts for making a sensor board we can go on with this project. I will not show my sensor board cose it's made real quick and it's not for the public just now. But i will show you the scheme of the board. It look's like this:

Here is the biger image of WeatherStation sensor scheme board
Setting the Pi:
- First we will have to download image of RASPBIAN Linux OS. Just go to: Raspbian home page and download ZIP file to your computer. When the image is downloading you can get a great tool for reading and writing images to drives like SD, USB, hardrives. It's called Win32DiskImager and you can get it here: Win32DiskImager download.
- Next you can connect your SD card to your computer and check what is SD's drive name. If the card is not blank you can format it or leve it because the image will delete data on her.
- Now run Win32DiskImager tool with admin rights and choose image that was downloaded before and set the right SD card. Click on Write and wait that the tool writes complete image to SD card.

- When the process is over you just unplug the SD card and put in on Raspberry Pi board, connect the power, the sensors board and network cable and off we go.
- First thing that you will notice is that the led's on Pi board will flash. Specially the green led is indicator the Pi is booting fine. Now as the Rasbian is booting the network cable is connected, Pi should get and IP address of your home router. The hostname of default Raspbian OS on Pi is called "Raspberry". You can try to ping the Pi with command on your Windows OS: Run: ping raspberry and you should get and IP address of your Pi board. If not there is a nice tool that you can scan your home LAN and find your device, It's called Angry IP Scanner and you can get it here: Angry IP Scanner. Just run the tool and write IP subnet you have on your home LAN. Something like that:

- Next grab a Putty tool, you can get it here: Putty SSH and connect your PI with SSH. The SSH server is enabled by default on Rasbian OS.
In Host Name point your IP address of Pi, choose SSH connection and clikc "Open"
- There should be a warning box that informes you that the fingerprint of RSa key of SSH does not mach key's in registry. Jutr ignore is with clicking "Yes".

- If everything go's well you should see login terminal of linux. For username use "pi" and for password use "raspberry". Now you are in terminal SSH on Raspbian linux on your Pi board.

- From now on we will start with configuration of Raspbian. All configuraton will be done in Putty SSH terminal so all you have to do is folow the screenshots. First i like to set a static IP address of my Pi board so it's eazy to use Pi. You can skip this part if you want dynamic IP address or even if you are using hostname for connecting Pi.
- Setting static IP address on your Pi with Raspbian. Use thise commands:
pi@raspberrypi ~ $ sudo nano /etc/network/interfaces
next it will popup nano editor and you can modify data. You have to add the data and change is something like this:auto loiface lo inet loopbackiface eth0 inet staticaddress 192.168.15.200gateway 192.168.15.1netmask 255.255.255.0network 192.168.15.0broadcast 192.168.15.255allow-hotplug wlan0iface wlan0 inet manualwpa-roam /etc/wpa_supplicant/wpa_supplicant.confiface default inet dhcp

Be avare that you must set address, gateway, netmaks, netowork and broadcast to your LAN. This is just example of my settings.
- Next press "Alt+x" then "y" and press ENTER and you will save editor. Then just reboot the pi wih command:
- You can start configuration setup and set basic settings there by entering command:
pi@raspberrypi ~ $ sudo raspi-config
If you want you can change default "pi" password with command:
pi@raspberrypi ~ $ sudo passwd pi
and want to update keymaps and time zone do:
pi@raspberrypi ~ $ sudo dpkg-reconfigure tzdata - It's goot that our Raspbian is up to date so lets check update and do upgrade:
pi@raspberrypi ~ $ sudo apt-get update
- and upgrade with command:
pi@raspberrypi ~ $ sudo apt-get upgrade
- once the upgrade is finished (and it mite do some time) just reboot Pi with already known command:
pi@raspberrypi ~ $ sudo reboot - Once Pi is rebooted you can connect with the static IP address you have hiven. In my example it's: 192.168.15.200
- Next we will need web server on Pi. For that we will use Apache with PHP. To install apache do command:
pi@raspberrypi ~ $ sudo apt-get install apache2 php5 libapache2-mod-php5
- some aditional space must be granted so just type "y". It will install web server Apache and after it's installed we can test is by opening your web browser and poiting to IP of your Raspberry Pi for example: http://192.168.15.200 You should get a text like this:
- For storing data we will use RRdtool so we have to install it with:
pi@raspberrypi ~ $ sudo apt-get install rrdtool
then we will install python smbus library. Will do this like this:
pi@raspberrypi ~ $ sudo apt-get install git build-essential python-dev python-smbus
Once again let's make sure we stored currectly all configuration, reboot Pi:
pi@raspberrypi ~ $ sudo reboot - Now we have Apache web server for our WeatherStation web page and we have RRdtool for storing information in database. Next we will use nice tool for transfering file to Pi. It's very useful tool and eazy to use. It's called WinSCP and you can get it from here: WinSCP download site. You can choose from portable version or installer. Download the tool and run it. In the WinSCP login box you can save new profile to connect to your Pi. Once you have edit the profile just click "Login".

I will try to connect to you Pi but there will be warning box again so just click "Update" or "Add".

- Great, if everything was ok we shuld be connected to Pi with something like this:

- For now we have SSH connection we have Apache web server and we have file transfer with WinSCP tool. Let's get going by creating folders and permissions to file's we will upload to Pi. First we will create a directory in out home folder and our web folder. So do next:
pi@raspberrypi ~ $ mkdir -p /home/pi/project/WeatherStation
and create folder in a /var/www/ path:
pi@raspberrypi ~ $ sudo mkdir -p /var/www/WeatherStation
then we will change ownership of the folder to "pi" user with this command:
pi@raspberrypi ~ $ sudo chown pi:1000 /var/www/WeatherStation -R

- We have folder's waiting for scripts, web page and database. Now just download complete package that i have created and save them in to your computer. The complete files are here:WeatherStation files.
- Unpack complete files and save them somewhere on your computer then connect with WinSCP and on the left side choose unpacket files you have downloded and on the right side go to folder "/var/www/WeatherStation".
Fist we will transfer "web" folder so just open the wolder known "web"grab all files and folder that are in the web folder and transfer them in to the right side on the path "/var/www/WeatherStation". Something like this:
 Now open folder "scripts" on the left side of the WinSCP and choose folder and 3 files for transfering to the right side on the path "/home/pi/project/WeatherStation"

- Now we have to change some permisson on files's so they can be executed. Go back to Putty SSH and run this:
pi@raspberrypi ~ $ sudo chmod +x /home/pi/project/WeatherStation/rrdGraphs.sh - Oky, so we did allmost everything we need to do to configure the Pi. Now we will test the sensors. First we will test external temperature sensors DS18B20. Do next:
pi@raspberrypi ~ $ sudo modprobe w1-gpio
pi@raspberrypi ~ $ sudo modprobe w1-therm
because the newer firmware disables w1-gpio, you must add line:"dtoverlay=w1-gpio" to "/boot/config.txt". For example in Raspbian Wheezy with kernel version 3.18 (date 5.5.2015) you must add this, else it wont read DS18B20 sensor. You do next:
pi@raspberrypi ~ $ sudo nano /boot/config.txt
and add: dtoverlay=w1-gpio
when you save file with editor (Alt+x, and type "y"). Do a reboot of RPi with command
pi@raspberrypi ~ $ sudo reboot
next you must check you ID of DS18B20 by listing folder. Go to:
pi@raspberrypi ~ $ cd /sys/bus/w1/devices
ans list folder so you can see what is ID.
pi@raspberrypi ~ $ ls
you will see folder like this:"28-00000xxxxxxx". Then "cd" that folder (for example):
pi@raspberrypi ~ $ cd 28-000005f40f1c
and execute cat like that:
pi@raspberrypi ~ $ cat w1_slave
you will get id, crc and then on the end there will be something like that "t=33500". That's the temperature in C. If you get resoult something like in the picture your DS18B20 temeperature sensor is working!
- As we are at DS18B20 temeprature sensor you can than recorect the python script that has set ID of temeprature sensor. This is nesesery cose script must know the right ID of sensor. We will fix this by using nano editor. Do next:
pi@raspberrypi ~ $ nano /home/pi/project/WeatherStation/readsensors.py
and go to the part where is: " cmdStat, cmdOut = commands.getstatusoutput("cat /sys/bus/w1/devices/28-000005f40f1c/w1_slave") " and change the part of "28-000005f40flc" with you id of DS18B20 sensor.
When you'r done just press "Alt+x" and choose "y" and you are done with external temperature sensor. - Next is the DHT11 sensor that mesaures humidity. The library's are allready there but we must install them. So do next:
pi@raspberrypi ~ $ cd /home/pi/project/WeatherStation/library/Adafruit_Python_DHT
pi@raspberrypi ~ $ sudo python setup.py install
then we will test the DHT11 sensor:pi@raspberrypi ~ $ cd /home/pi/project/WeatherStation/library/Adafruit_Python_DHT/examples
now you must folow the varibiles like this. When you run python script you add 11 and 17 in the end of script. "11" is the model of the sensor and "17" is the GPIO pin. So you do next:
pi@raspberrypi ~ $ sudo python AdafruitDHT.py 11 17
you will get something like this:"Temp=29.0*C Humidity=33.0%". As you can see the DHT11 sensor has his own temeprature sensor that can be used for internal temperature and there in the end of resoult you can see humidity in %.
- Next is the BMP085 or BMP185 sensor. They are the same in the characteristics. I had a BMP180 model as it's a smaller and shuld be newer. We will use BMP180 model for reading interior temperature, atmospheric pressure and altitude sensor.
First we must install modele's and test the sensor. As we already did a python-smbus and i2c-tools upgrade we need to enable the I2C module. To do that we have two choice's. We can do it with "raspi-config" command or manualy. So for doing manualy do this:
pi@raspberrypi ~ $ sudo nano /etc/modules
then add thise two modules: "i2c-bcm2708" and "i2c-dev". Like this:

Press "Alt+x" and then "y" for saving the file. Reboot the Pi one more with know command:
pi@raspberrypi ~ $ sudo reboot - Or doing it with "raspi-config".
pi@raspberrypi ~ $ sudo raspi-config


pi@raspberrypi ~ $ sudo reboot - Once we are back from reboot let's try if this baby works. Just do next:
pi@raspberrypi ~ $ sudo i2cdetect -y 1
or if you have 256MB version of Raspberry Pi then do:
pi@raspberrypi ~ $ sudo i2cdetect -y 0
at this point you will see a registery from 00 to 70 and then some number's at them. As we see in this picture we have some data in 20 line and 70. Because there is a digital light sensor conected to I2C we see two registry devices. The one we are looking in BMP085 sensor is his default address 0x77 or 77. With this test we see that our I2C devices are working properly.

We must now install the librarys and test the sensor by doing this:
go to your library folder:
pi@raspberrypi ~ $ cd /home/pi/project/WeatherStation/library/Adafruit_Python_BMP
pi@raspberrypi ~ $ sudo python setup.py install
now let's test if the sensor is giving as some data:
pi@raspberrypi ~ $ cd examples
pi@raspberrypi ~ $ sudo python simpletest.py
again if everything was oky it should give you reading data from sensor like this:

- As for digital light sensor GY30/BH1750FVI we don't need no library because it's a I2C device and we already tested I2C. It's just a other registry address that will be used. In this example it's a 23 address. But if you still want to test it with i2cdetect command:
pi@raspberrypi ~ $ sudo i2cdetect -y 1
or if you have 256MB version of Raspberry Pi then do:
pi@raspberrypi ~ $ sudo i2cdetect -y 0
and you will get a resoult like this:
- So if we follow this tutorial we can start using python and batch script i have made. First let's try if our sensors are fully working and if there is eny data. So we do next:
put your self in to the path:pi@raspberrypi ~ $ cd /home/pi/project/WeatherStation/
then execute the python script with root privileges.
pi@raspberrypi ~ $ sudo python readsensors.py
the script must be done in about second or two. If you want you can turn on debuger with this:
pi@raspberrypi ~ $ sudo python readsensors.py -d

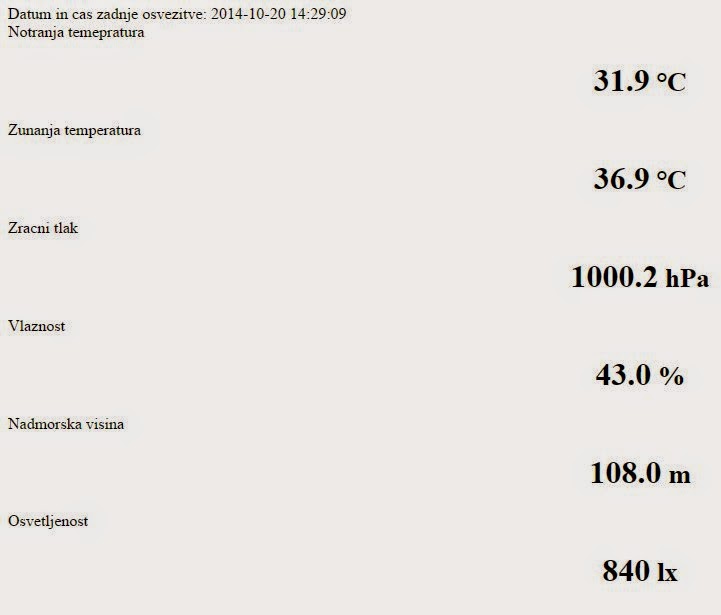
you will see data from each of the sensor. Now there is a HTML page that can be used to check of current sensor data. It's called current.html and you can view it with your browser at address:
http://your_IP_address_of_your_Pi/WeatherStation/current.html - If you got something like this than your sensors, modules, library's, permission are working! Now let's try the main page for WeatherStation. Just got to hyperlink:
http://your_IP_address_of_your_Pi/WeatherStation/
and you should get this:

- As you see there are no graphs but we will fix this in a minute or two. For creating and storing graphs there is a RRDTool. The database is already created (not sure if it is blank) but you can create it your self if you want. The file is called weatherRRD.rrd and it's located in /home/pi/project/WeatherStation/ folder.
There is also a batch script that will create graphs in to a .png image file. To create graphs so they can be seen in home page run:
pi@raspberrypi ~ $ sudo bash /home/pi/project/WeatherStation/rrdGraphs.sh
and graphs will be created. You will see just a resolution of image's. Something like this:

- Now we must just check if we have all graphs in place in your home page of WeatherStation.
Go to http://IP_of_Your_Pi/WeatherStation and you should see graphs.

- As we have now script that reads sensors and we have batch that is updating data in to database and in to image file's. Now we must to a schedule with a crontab command so this script will be triggerd in some interval. To set this we must do:
pi@raspberrypi ~ $ sudo su
root@raspberrypi ~ $ cd /home/pi
root@raspberrypi ~ $ crontab -e
then you must add this two line's in a crontab scheduler:
*/2 * * * * sudo python /home/pi/project/WeatherStation/readsensors.py*/5 * * * * sudo bash /home/pi/project/WeatherStation/rrdGraphs.sh
it look's like this:
 and the crontab itself:
 As you can see there is a 2min interval for reading sensors and 5min interval for doing graphs. Save your work with pressing "Alt+x" and type "y" and you are all done!
Now it's good to reboot the Pi so we can check if everything is working. Do:
root@raspberrypi ~ $ sudo reboot
- Now just sit and relax as the Pi is rebooting. When is UP and running you can check your internal WeatherStation web page if the sensors and graphs are updating.
As this is a early project of myne i'll try to fix and update some of the stuff i'm trying to do but if you want to contribute in this project feel free to contact me as we can do this project useful for all those out there who like's Raspberry Pi. Most of language of WeatherStation is in slovenian language but in the future i'll try to translate it to english.
Be well for now!
v1.0b - 23.10.2014
Stanko Petrič
in my case it's a: http://192.168.15.200/WeatherStation/current.html
and you must see data like this:
Addons:
Adding a schaduler task on you web server for copying file's from Pi to let's say your linux web server.
- So let's say u want the web file's that are created on Pi copy to web server somewhere on your lan network or even on internet and you want that the server does this automaticly on the server. I used a Ubuntu Apache web server on my LAN for web serving so i needed a crontab ask for copying files. I did this:
- Login with SSH (Putty) on your web server. I did this on my Ubuntu Apache server.
- go to your home folder. Let's say it's a: /home/user
- then run: ssh-keygen -t rsa
and just press 2x enter without entering a password. It will create a public RSA key.
Now copy id_rsa.pub key in to your host where the files will be used (source files) in your folder let's say home folder. So with help of WinSCP transfer the file that is located in /home/user/.ssh/id_rsa.pub to your PC or directly to your Pi on your home folder /home/pi - if you have id_rsa_pub on Pi then use Putty again and go to your home folder /home/pi
- then do next:
cat id_rsa.pub >>~/.ssh/authorized_keys
chmod 700 ~/.ssh/authorized_keys - Now this is done. Now you can try on the (destination server) running a copy command. Let's do this, in my case:
scp -r pi@192.168.15.200:/var/www/WeatherStation/ /var/www/web_folder/ - If this is working and you then you can set schedule on your linux machine (my case Ubuntu server) with help of crontab:
crontab -e
then add in file:
*/2 * * * * scp -r pi@your_IP_of_Pi:/var/www/WeatherStation/ /var/www/web_folder/apt-get update
apt-get upgrade
rpi-updateSetting up a webcam:Then you need to installfswebcamapt-get install fswebcamOnce all the above has been installed, plug your webcam in and reboot. Make sure that your webcam is seen by the system.lsusb
Bus 001 Device 005: ID 046d:082b Logitech, Inc.There are many switches and options available, so I will explain what I used and how to get a full list. Run this command to capture an image.fswebcam -r 640x480 -S 10 -d /dev/video0 webcam.pngfswebcam- The program that is being executed
-r 640x480- Setting the resolution for the image
-S 10- Skip the first 10 captures. With my webcam, if I save the first image captured, it gets corrupted. So by adding this option, the camera takes 10 images and only saves the last one.
-d /dev/video- This sets the device name. To get yours, execute
ls /dev/and look to see what your device is called
webcam.png- This is the file name of the saved image
By executingfsweb -h, you can see all the options.
Raspberry Pi Camera addon
sudo raspi-config

sudo su
crontab -e
*/1 * * * * raspistill -vf -rot 270 -hf -st -o /var/www/WeatherStation/img/capture.jpg